Publishing a New Dreamweaver Website
You’ve made your website in Dreamweaver and want to upload or publish it to your host webspace. When uploading or publishing your web page files for the first time with Dreamweaver you first need to ‘Define’ where you want to ‘Put’ your local and remote files. In this example we use PowWeb as our host and Dreamweaver MX 2004 screenshots. Open Dreamweaver and Click on Sites> Edit Sites (or New Site) It may also be called “Manage Sites” or “Define Site.”
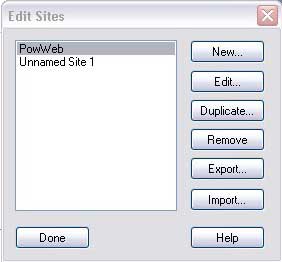
1) In the Edit Site box click on the Edit (or New) button.
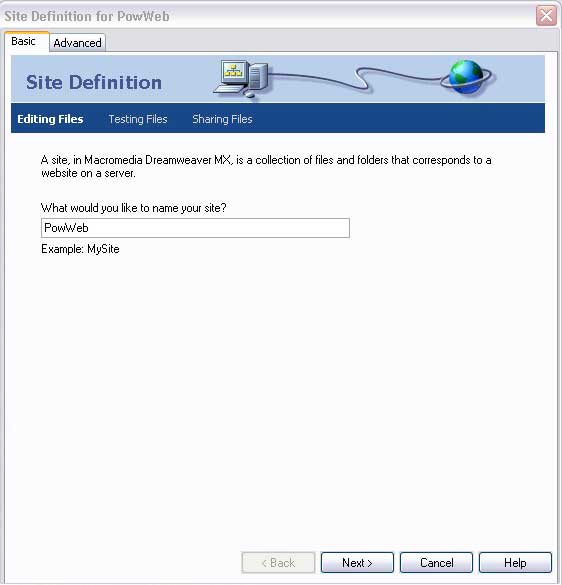
2) Enter a name for your site — click Next
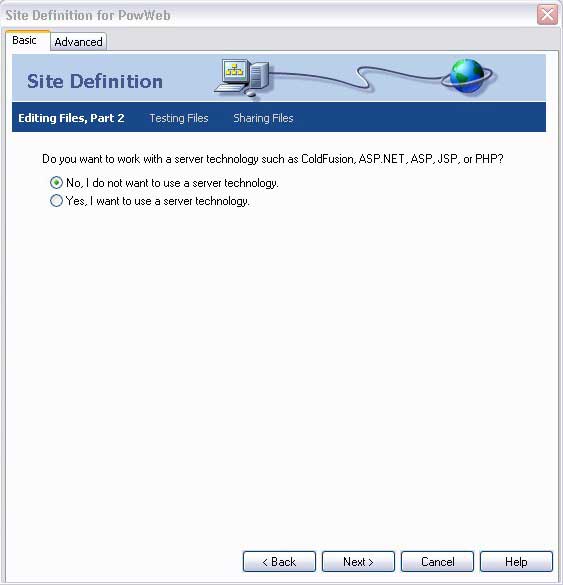
3) Tick “No, I do not want to use a server technology” — click Next
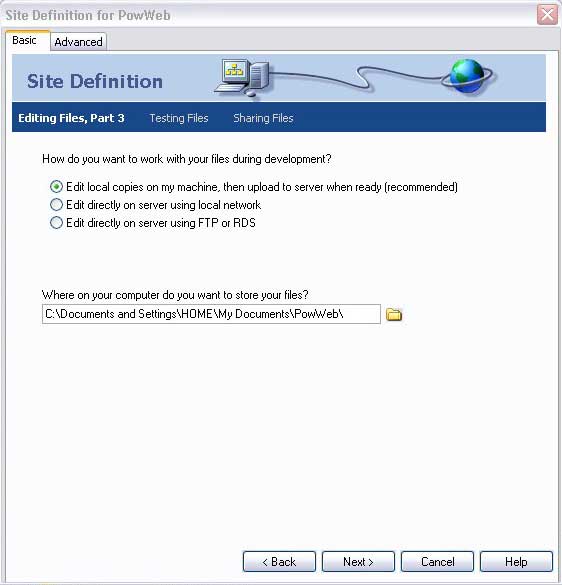
4) Tick “Edit local copies on my machine, then upload to server when ready” You can set a folder to store a local copy of your website files here, or leave the default — click Next
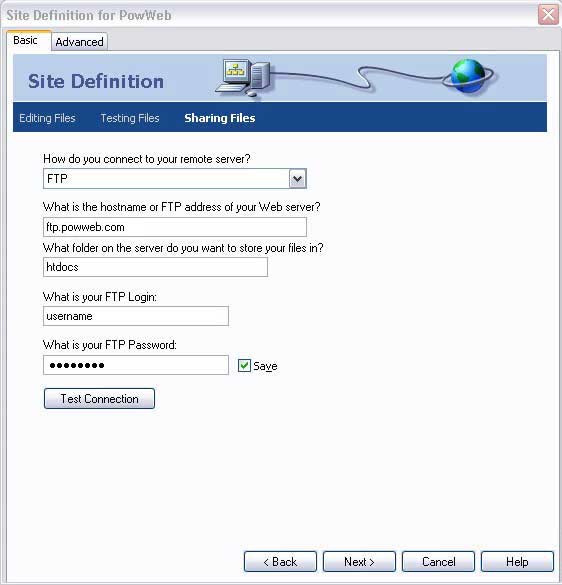
5) For “How do you connect to your remote server?” chose “FTP”
For “What is the hostname or FTP address of your Web server” type in: ftp.powweb.com
For “What folder on your server do you want to store your files in?” type in: htdocs
If you want to publish to a sub directory use: htdocs/foldername
Type your FTP username and password in and Tick “Save”
Test your connection — click Next
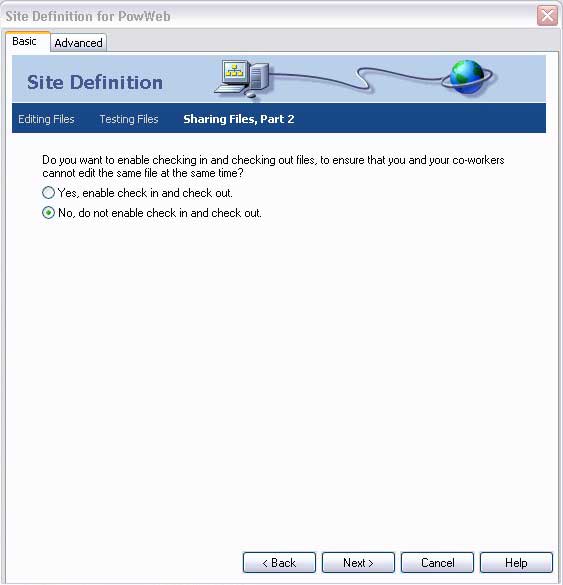
6) Tick “No, do not enable check in and check out” — click Next
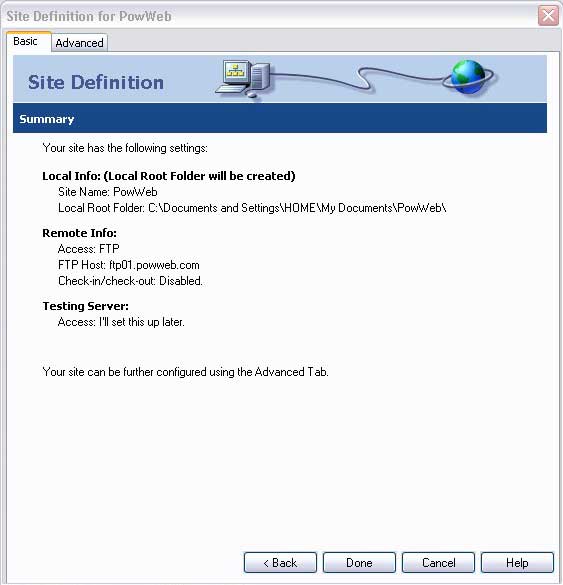
7) Double check all of your information.
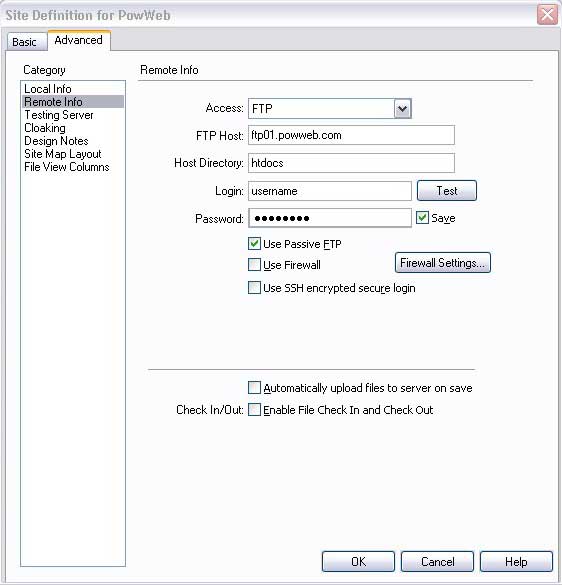
8) Click the Advanced tab> Remote Info> tick “Use passive FTP” — click OK

9) In the Edit Site box — click Done. Next we need to be sure your home page is named index when we publish to PowWeb. Locate your home page in the main window and click File> Save As> type in index.htm or index.html and make sure it is saving to the local folder we set earlier. Now you can connect to the server and upload or publish your Dreamweaver web site.
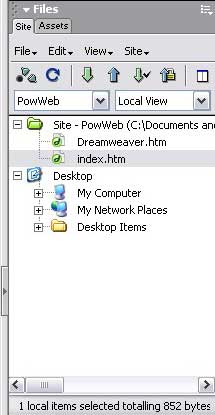
10) Click Window> Site> to open the Site panel
11) Click the “Connect to remote server” button — ![]()
12) Select all your website files and click the “Put” button — ![]()
THINGS TO NOTE
If you are asked “Include Dependent files?” click Yes. Dependent files are usually images and JSP class files. If at anytime you need to change the details for your remote server click Sites> Edit Sites> select the site and click Edit, to add another remote server to publish to click New. Do not use special characters (such as “,*, or $) or punctuation, such as colons, slashes, or periods, in the names of files you intend to put on a remote or testing server.
Now go and check out your new Dreamweaver website!! Enjoy.
Written by
Croc Hunter
streetsie.com
I have recently got POWWEB as a host. and i have done all of these steps to get my website up. everything has uploaded but i dont know how to make my website show the index.html that i have added to powweb. is there a publish button or something. PLEASE HELP.
hi nate; it’s most likely step 5) where any website files you want visable on the internet must be uploaded into of the /htdocs/ folder. And/or step 9) where your home page must be named index.html — that is lowercase index.html and inside the htdocs folder /htdocs/index.html If you are positive these exist correctly look for and delete any index.htm file inside your htdocs folder.
Thank you so much, I would have looked for days, dreamweaver is hard to understand >.>